


Solutions
By Design Type
By Industry
Hardware-Rich Development
.webp)
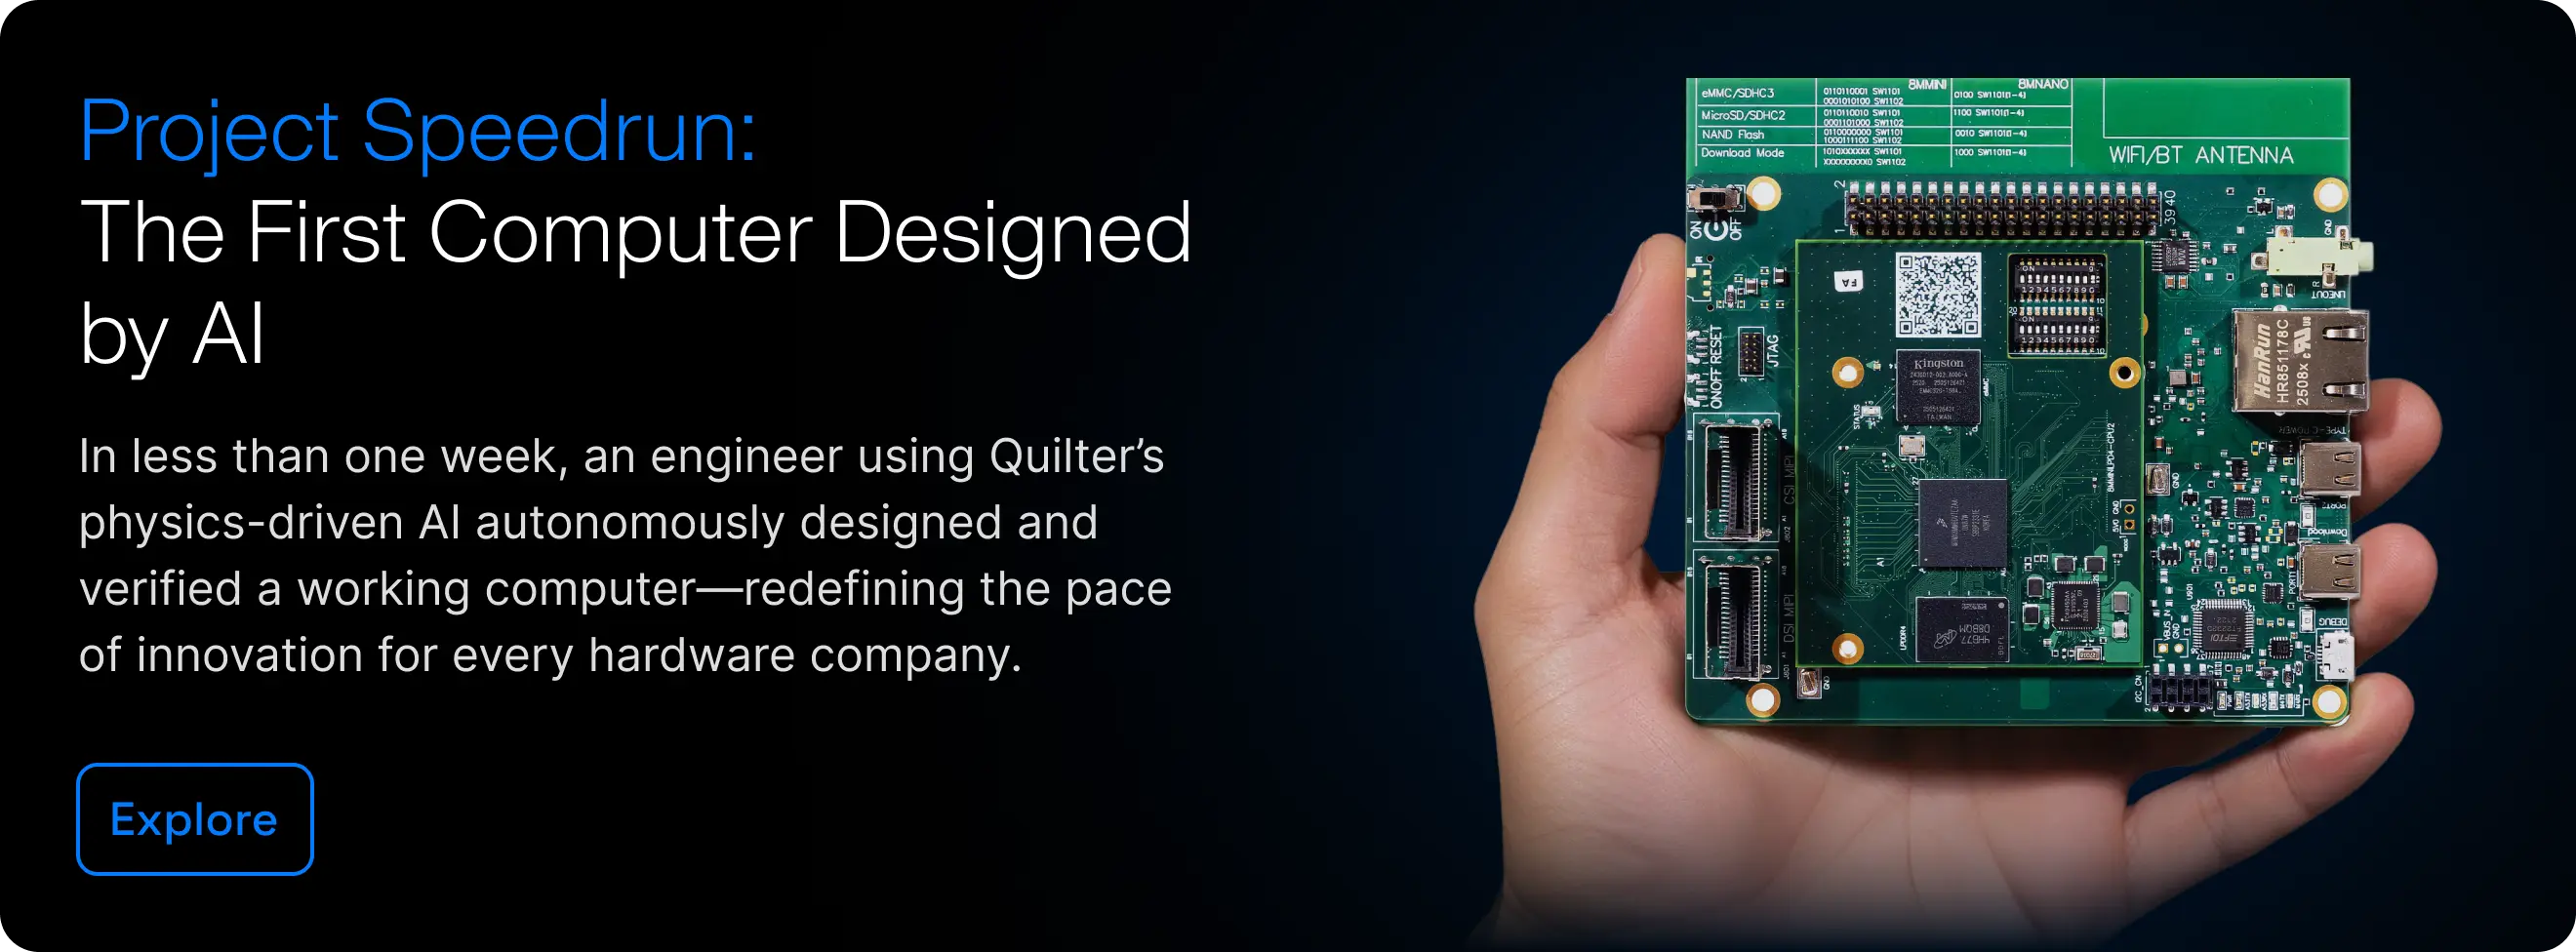
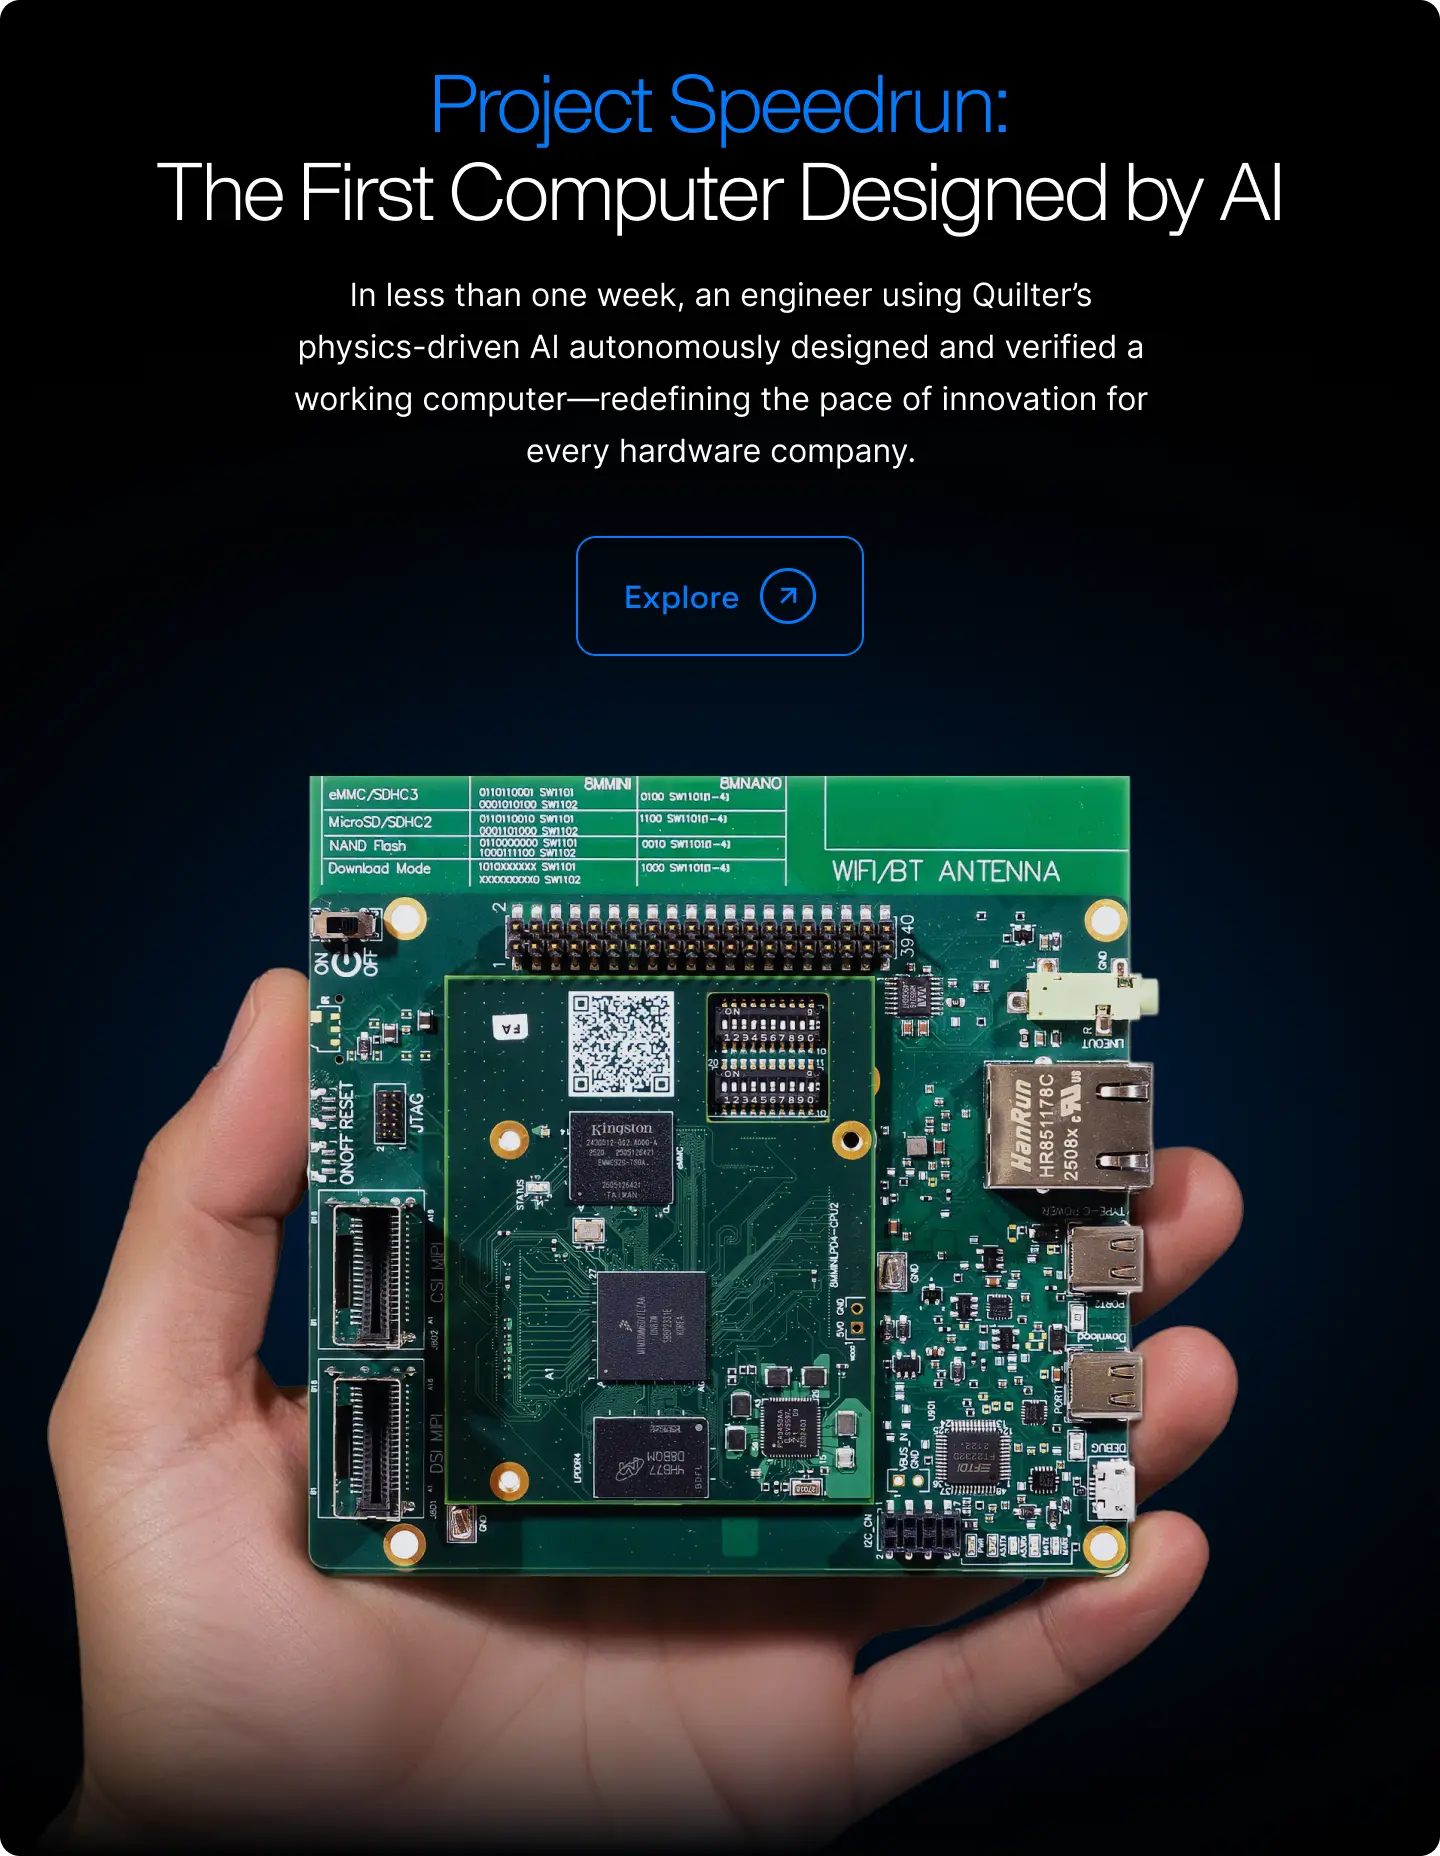
An engineer using Quilter completed the two-board system with 12 hours of cleanup on the baseboard instead of the 238 hours quoted for a manual layout, and 26.5 hours of cleanup on the System-on-Module (SOM) instead of the 190 hours quoted for its manual layout. In total, 38.5 hours of human input replaced 428 hours of estimated manual effort.
Hardware teams can now move from quarterly layout cycles to weekly learning loops, turning every design into an opportunity to test, iterate, and lead faster than competitors.
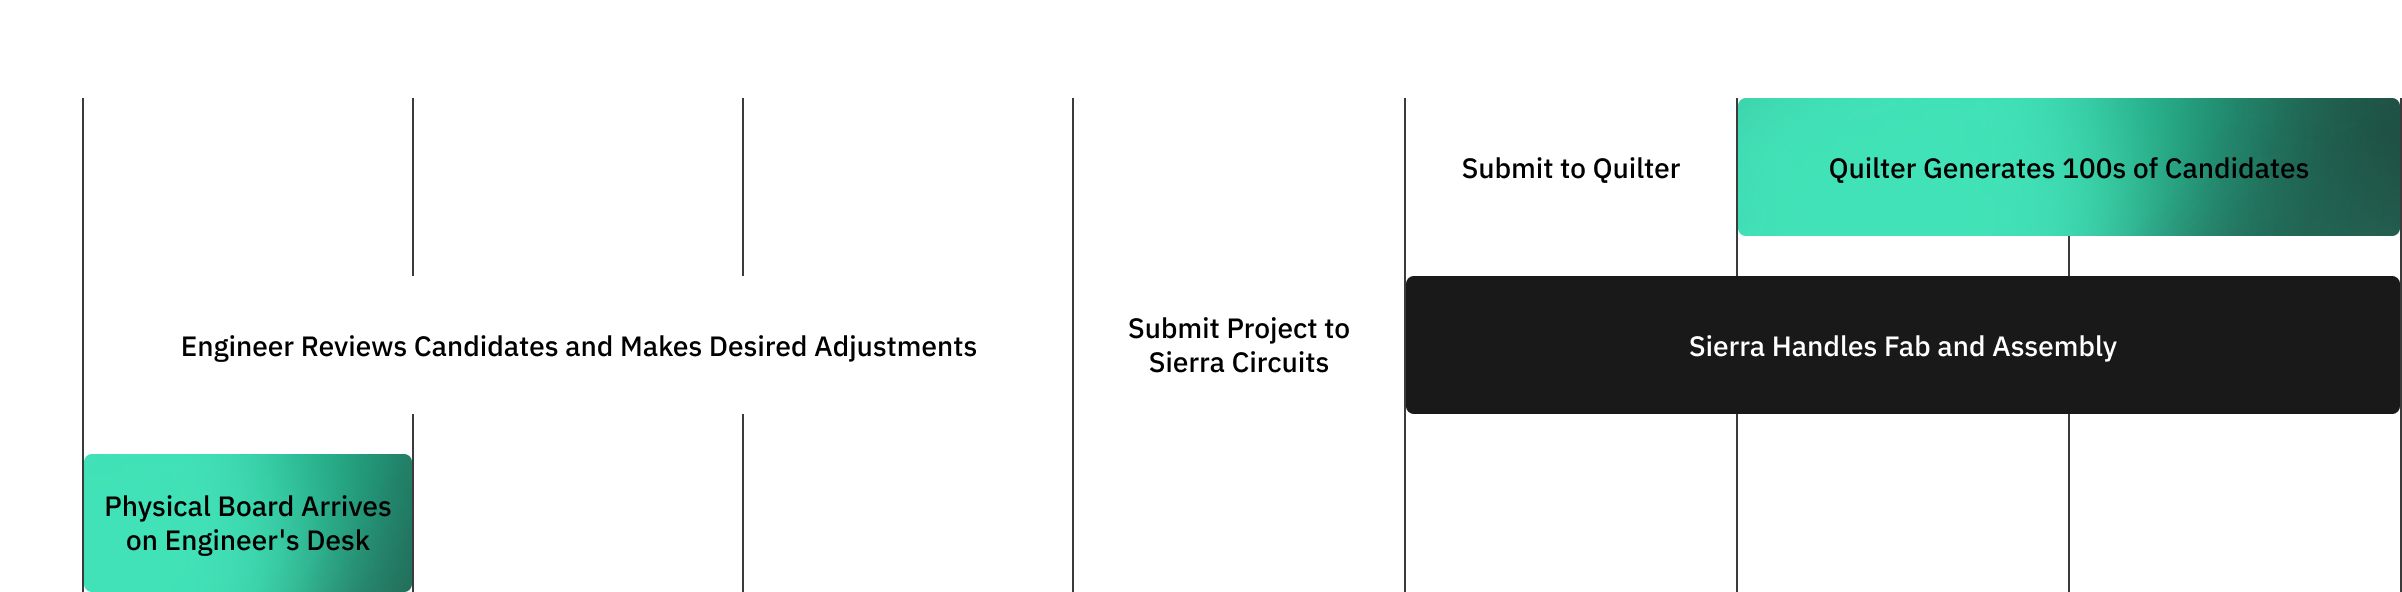
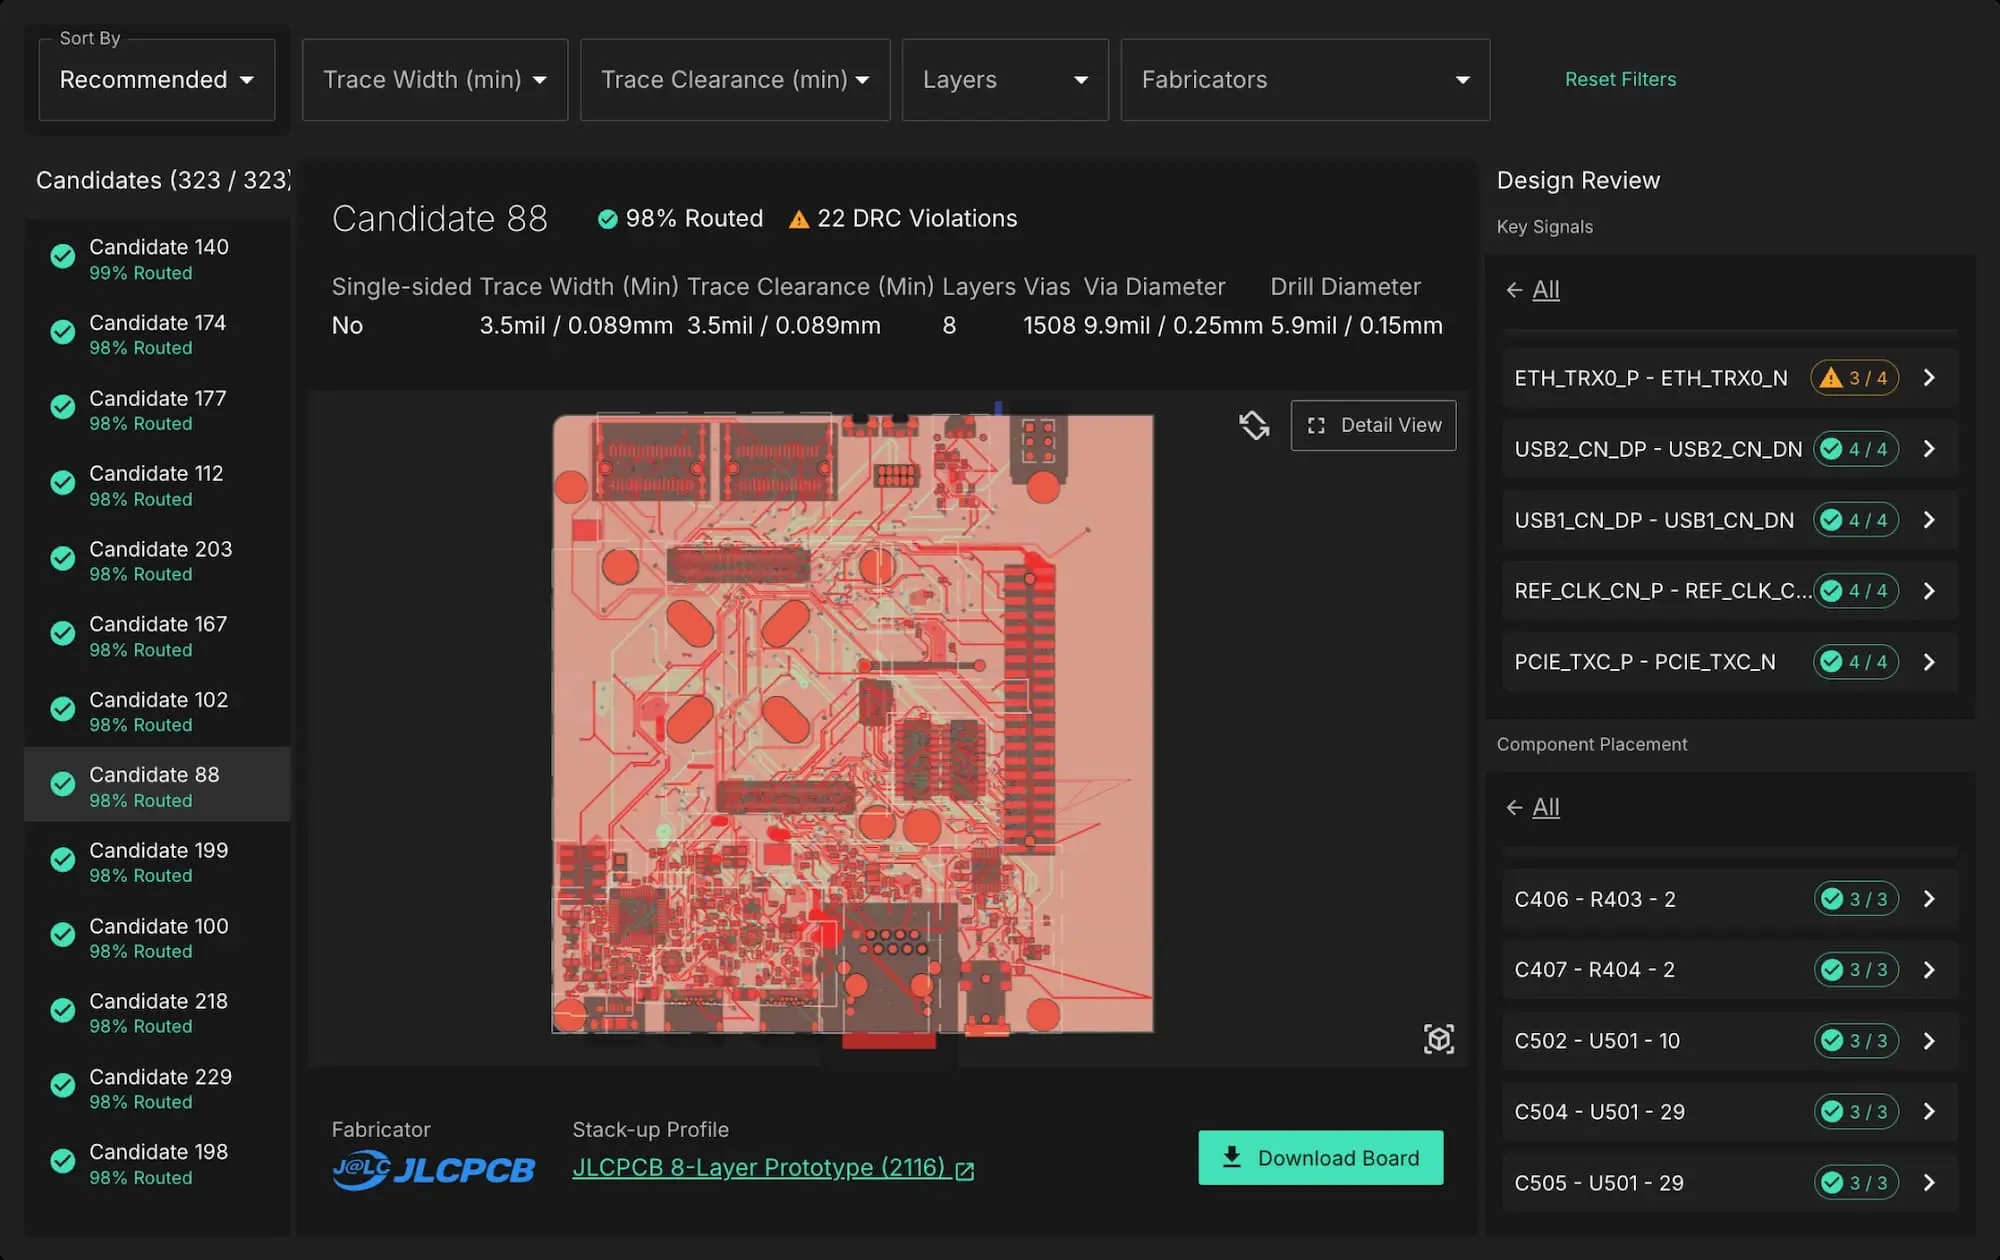
We chose to base our System-on-Module (SOM) + baseboard designs on the NXP i.MX 8M Mini evaluation platform Staff Electrical Engineer Ben Jordan prepared the design and constraints for the boards and submitted the jobs. Quilter ran parallel seeded runs with varied constraints, completing the layout in 27 hours, returning multiple ranked candidates.
Quilter took care of the repetitive design work while the engineer stayed in control. Automation handled placement, routing, and physics checks, freeing him to focus on firmware prep, documentation, and constraint refinement. Common supply-chain hiccups—a few connectors out of stock and a Wi-Fi module dropped—were resolved instantly, with no delay to iteration. Cleanup was minimal: PDN pours, via clusters, and minor footprint swaps—no rip-ups, no re-spins.
Project Speedrun proves Quilter’s physics-driven AI has crossed from concept to capability.
Core Architecture
Results
Human Design Hours with Quilter
38.5 hours
• SOM: 12 hours
• Baseboard: 26.5 hours
Human Design Hours without Quilter
428 hours
• SOM: 190 hours
• Baseboard: 238 hours
Quilter Runtime
27 hours (placement + routing + physics validation)
Routing Completion
98%
Bring-Up Result
First power-up success on both boards—no re-spins
This project demonstrates Quilter’s ability to autonomously complete the complex, embedded computing hardware commonly used in automotive infotainment, safety, and machine-vision systems.
Core Architecture
Processor
NXP i.MX 8M Mini Quad (4 × Cortex-A53 @ 1.8 GHz)
Memory
2 GB LPDDR4 (32-bit bus width)
Storage
32 GB eMMC 5.1 (upgraded from 16 GB reference part)
Flash Memory
32 MB QSPI NOR Flash
Audio
24-bit / 192 kHz DAC, 3.5 mm headphone jack
Networking
10 / 100 / 1000 Mbps Ethernet
Expansion
M.2 connector supporting PCIe
Board Design
Form Factor
Two-board system: System-on-Module (SOM) + Baseboard
PCB Stack-Up
8-layer HDI architecture, manufactured by Sierra Circuits
Trace / Space Geometry
2 mil (SOM) / 3.5 mil (Baseboard)
Component Count
843 total
Pin Count
5,141 total
Placement & Routing
Fully automated by Quilter AI
Get a full picture of how it works and why it matters through detailed stories and technical insights.
We partnered with Sierra Circuits for fabrication and assembly. The baseboard was completed on a standard 3-day fab + 3-day assembly schedule, while the SOM’s 2 mil HDI geometry required a longer lead time through Sierra’s advanced HDI precision and quick turnaround process line. We paid standard commercial rates, used the same ordering process available to any customer, and received no special treatment, demonstrating that anyone can reproduce these results using off-the-shelf services.
Before Quilter can generate a physics-driven layout, the design must be prepared: constraints defined, intent expressed, and structure made explicit. Continue to the first blog post for a detailed walkthrough of this preparation step.
